If you own a GM truck or other vehicle with a 5.3L smoking on startup, you should read this. When starting the vehicle after it has sat for a while you’ll get some bluish white smoke from the exhaust. You’re burning oil, but relax. It’s most likely oil that has seeped into the vacuum hose through the PCV valve.
The PCV Valve
The PCV valve is built into the valve cover itself. There is a channel from front to back that acts as a port to suck in crankcase gases. That channel ends up at the back of the engine where a vacuum hose feeds the gases into the intake. The channel has small oval holes machined into it along its length. A close inspection revealed that these holes were partially blocked off. I believe the holes are there to serve two purposes: 1) provide ventilation points to suck in gases in the crankcase 2) There are small oval drain holes along the ventilation channel for oil to leak back into the cylinder head.
What Causes the 5.3L Smoking on Startup
I believe that the oil stays in the ventilation channel after shutting down the engine. Considering that the vent holes are blocked by buildup, the oil does not drain back into the cylinder head. So when you first start the engine, a large amount of the accumulated oil is sucked into the intake system through the vacuum hose. This of course, results in a small cloud of smoke. I’m certain that there is also a constant stream of oil being sucked into the intake system during normal operations as well. This would hold true since on this particular engine, there is about a quart of loss every several weeks.
Valve Cover Clogged Oil Vents OEM on the left and Dorman on the Right
Notice that the OEM unit above on the left has clogged drain holes. It also has vents. The vents provide another entry point for oil to enter the PCV channel. The Dorman valve cover has no vents or drain holes and instead relies on a single vent. You can see this vent on the top of the valve cover
Alternative to Replacing the Valve Cover
There is a replacement aftermarket valve cover from Dorman that can remedy the problem with a revised PCV system. However, there is a $130.00 price tag for it! If spending that much on a valve cover bothers you, you can remove the stock cover and use a engine cleaner to soak it and clean with a rag.
Partially Cleaned OEM Valve Cover
Pay close attention to the drain holes (see picture above and to the left) If this does not remedy the problem then you most likely will have to go with the aftermarket Dorman product. Given that we had already purchased the Dorman cover, we went ahead with installing it. Notice the drain holes have been cleaned out.
Removing the Valve Cover
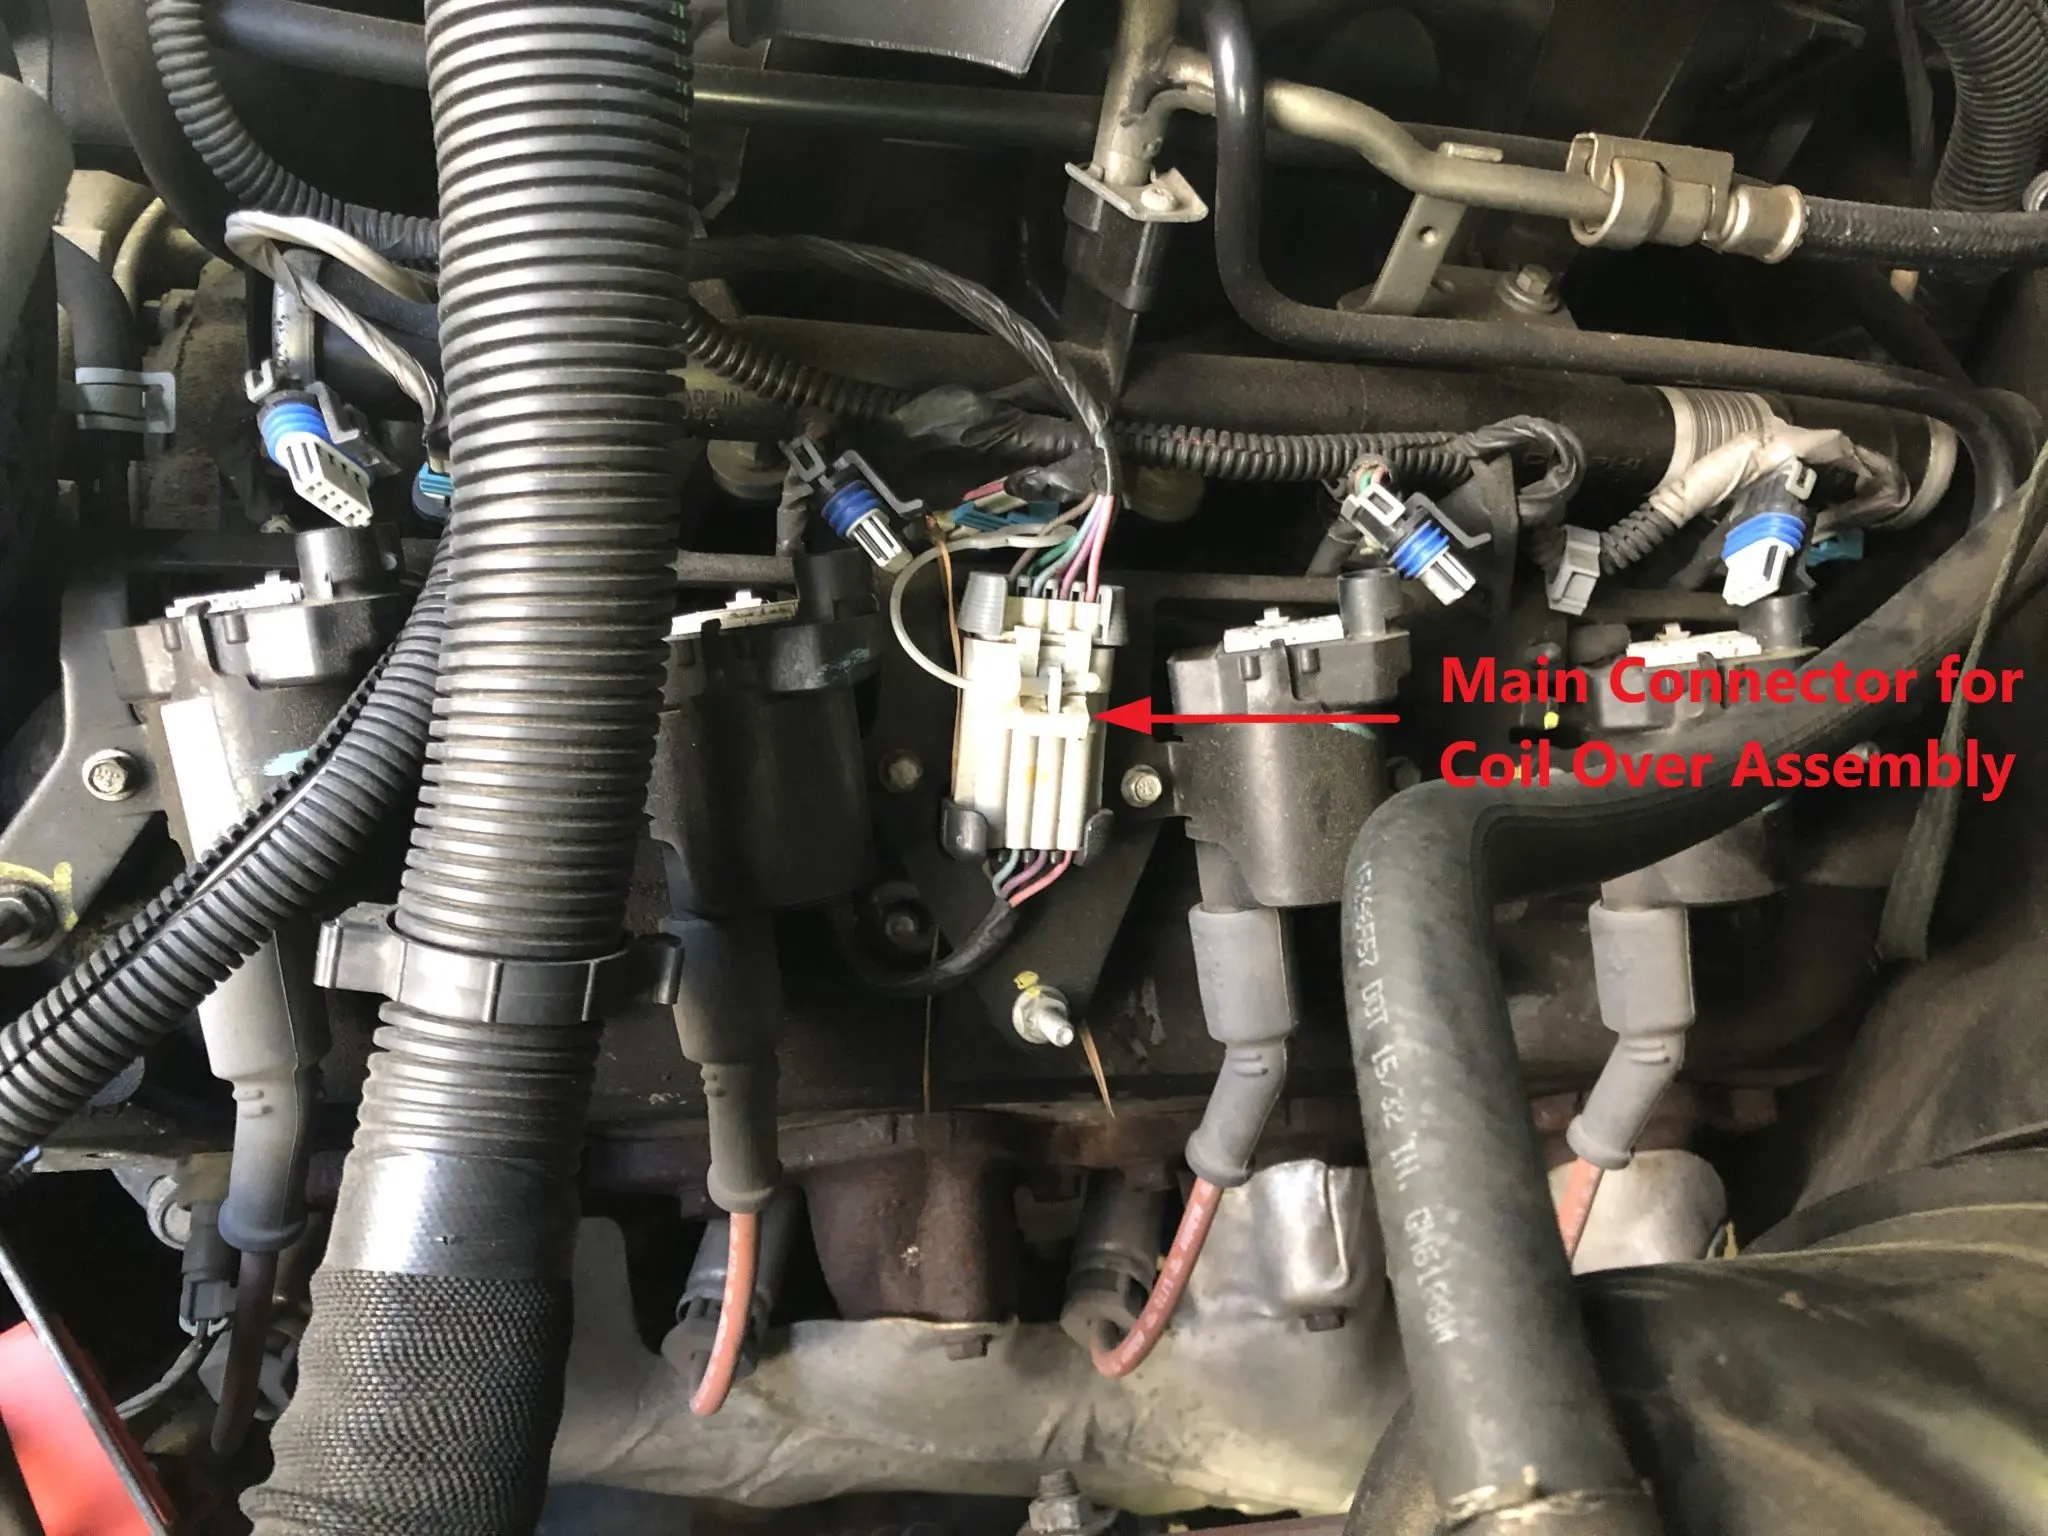
Removing the valve cover is relatively simple on this engine. First, you have to get the coil over assembly out of the way. These coil overs are all bolted together on a single assembly. Disconnect the large center electrical plug. Remove the five bolts holding the coil assembly on to the valve cover. You can now fold the assembly down and out of the way.
If you’d like, you can also disconnect the wires from the plugs and take the coil assembly completely out.
Coil Over Assembly - Main Connector - Notice that I had disconnected the individual coils, which is not neccesary
Next, disconnect the vacuum hose. You’ll find it connected to the top of the valve cover towards the rear of the engine. After you have the hose off, undo the four bolts holding the valve cover on. At this point, you can lift the valve cover off off the engine. To ease removing it, slide it toward the back of the engine. Lift up towards the front and ease it forward as you are lifting.
Chevy 5.3 Valve Train - Valve Cover Removed
Removing Last Bolt on Valve Cover
Installing the Valve Cover
Installing the Dorman valve cover (or the cleaned original) is as easy as reversing the steps you took to take it off. Clean the gasket mating surface on the Cylinder head. Slide the cover back on. Tighten the four bolts that hold the cover on. Tighten these to specified torque specs (8 Ft-Lbs). Reinstall the coil assembly with the five bolts you removed. Reconnect the connector for the coil assembly!
Side Note:
Why GM decided to do away with the simple PCV valve and build it into the valve cover completely escapes me. I get the sense that current engineering principles lean towards the more complex (and more likely to fail) than in the past.
Installed New Dorman Valve Cover
After re-assembling this, we gave the truck a test. Started it up. It had a light puff of smoke which I suspect was residual from before changing the valve cover. We repeated this several times and there was no more smoking on startup!