I finally have the topside finished! Watch as I go through entire process of getting the topcoat of polyurethane boat paint on. I used Total Boat Topside WetEdge in Classic Boston Whaler Blue. It’s a single part polyurethane marine paint and simple to use. Most of this was rolled on but for the most obvious spots like the Bow, Transom and sides I used the roll and tip method which gave great me results. Boat painting can be challenging, but doable by most DIY how to folks.
This boat restoration has been the most challenging so far. There has been a lot of fiberglass repair using epoxy resin, fairing compound, totalboat primer and the list goes on.You can read the articles i have posted to date here : Boston Whaler 13 Restoration. Getting these final coats of finish marine paint on is a major milestone in my book.
Preparing for the First Coat of Totalboat Wetedge Boat Paint
Sanding and Cleaning the Topside
The first thing I did before even getting close to a can of boat paint was sand the primer. I used 3m no-slip sandpaper. I love the stuff, it’s a bit more expensive than your typical run of the mill sandpaper. But, it’s worth it. It lasts far longer than regular sandpaper and the backing is somewhat rubbery.
I used 220 grit to prepare the primer for the first coat of topside boat paint. Once the sanding was complete,I washed out the entire interior of the boat. I used a mixture of water, dawn dish soap and ammonia. The goal being to get it squeaky clean so that marine paint has a solid base to adhere too.
Getting the Brushes Ready for Marine Paint
Before laying a single brush or roller full of marine paint on there were a few things that I needed to do. First was getting all of my brushes in order. I used a 2″ chip brush, a 2.5″ RedTree Badger brush (for tipping) and a 6 inch fine foam roller brush for this. Part of the preparation was getting the brushes ready.
To do this, I dipped the brushes in thinner and then spun the excess off. This prepares the brush to hold a decent amount of paint without getting overloaded. This is especially important for the tipping brush. The tipping brush does nothing but smooth the coat that was rolled on. If you’re putting paint on with the tipping brush, something went wrong somewhere along the line.
Redtree Badger Tipping Brush In Spinner
Preparing the Marine Paint
The next step in preparation was getting the paint ready. I used two additives to the Total Boat Wetedge polyurethane boat paint. The first is a good quality thinner, in this case the Pettit 120 thinner. The next is strictly optional, I added Pettit performance enhancer. Both of these help the paint lay down smoother as it cured. The enhancer makes it cure harder and yet flexible enough top prevent cracking.
I added both in a ratio of +/- 7%. Since I planned on working with 8 oz at a time, I added .3 oz of the enhancer and .3 oz thinner to 8 oz of the marine paint. This gives me about a 7.5% mix of thinner/enhancer to paint. Well within the 10% max that is recommended for boat paint.
Applying the First Coat of Boat Paint to the Boston Whaler
In my opinion, the first coat is as important as the last. Any mistakes in the first coat will show through, no matter how many coats you cover it with. The good news is that, after proper curing, you can sand down any mistakes you make with the first coat. This means that the first coat is a good one to familiarize yourself with new techniques such as rolling and tipping.
In my case, I focused on getting a good solid base coat on. I did roll and tip some of the sections that are more obvious cosmetically. The bow, sides and transom being the focus there. The rest of the boat I rolled, and in some case brushed the boat paint on. Particularly the floor. Rather than completely strip it, I kept the original diamond pattern. The foam roller worked perfectly in getting a nice even coat of paint on the floor.
Rolling and Tipping
Rolling and tipping turned out surprising well. The method for this is to roll on a thin coat of paint. Make sure that you have thinner and if desired, performance enhancer. The additives let the paint flow smoother and delay the cure time, giving it time to self level. After rolling a thin coat on, take your tipping brush and lightly wet the tip of the brush with paint (don’t forget to pre-wet it with thinner and spin it off first).
Tipping Brush Loaded Ready to Tip
Rolling and tipping Marine Paint Horizontal Tip
Once you have some paint on the tip of the brush, lay it into a corner or edge of the area you just rolled. Then lightly drag it across the rolled paint. If possible, just use the weight of the brush. Alternatively, you can apply pressure but apply very light pressure if you do so. The intent of tipping is to knock down “bumps” left by the roller. Here are a few points about tipping that you should know:
Add thinners and or enhancers to help get a smoother finish, the hotter the weather, the more thinner you will need.
Don’t exceed 10% thinner and enhancer
Tipping is to smooth the surface, not to put paint on
Tip across the direction you rolled the boat paint on
When applying a second coat, roll it in the opposite direction as you rolled the first one (the same applies to the tipping direction)
Applying the Second Coat of Boat Paint to the Boston Whaler
Once the first coat was dry and had some time to cure I carefully examined it. I looked for obvious defects such as paint runs, thick apparent strokes. I’m ashamed to admit it, but I found some glaring misses as well! Next, I lightly sanded the entire boat with 320 grit sandpaper, paying special attention to the areas that I had already identified as needing it. Once I was done with the sanding, I washed the entire boat down again and then wiped it down with acetone.
When I was putting the first coat on, I noticed that getting the inside port and starboard sides painted was difficult. It was easy enough to paint. But, you really couldn’t see well enough into the sides to do any detail work, let alone roll and tip appropriately. So I rolled a second coat on the floor. Once that dried and cured, I could get in the boat and do a much better job of getting the boat paint on.
Vertical Tipping in the Rolled Boat Paint
I added the second coat in sequence. First, I did the bow area, rolling and tipping (in the opposite directions from the first coat).Next, I did the transom and rear bulkhead. I could do all of these from the outside with no difficulty. The last step of the second coat was to get into the boat and roll and tip the inside bulkhead as well as the inner sides.
A Third Coat of Marine Paint
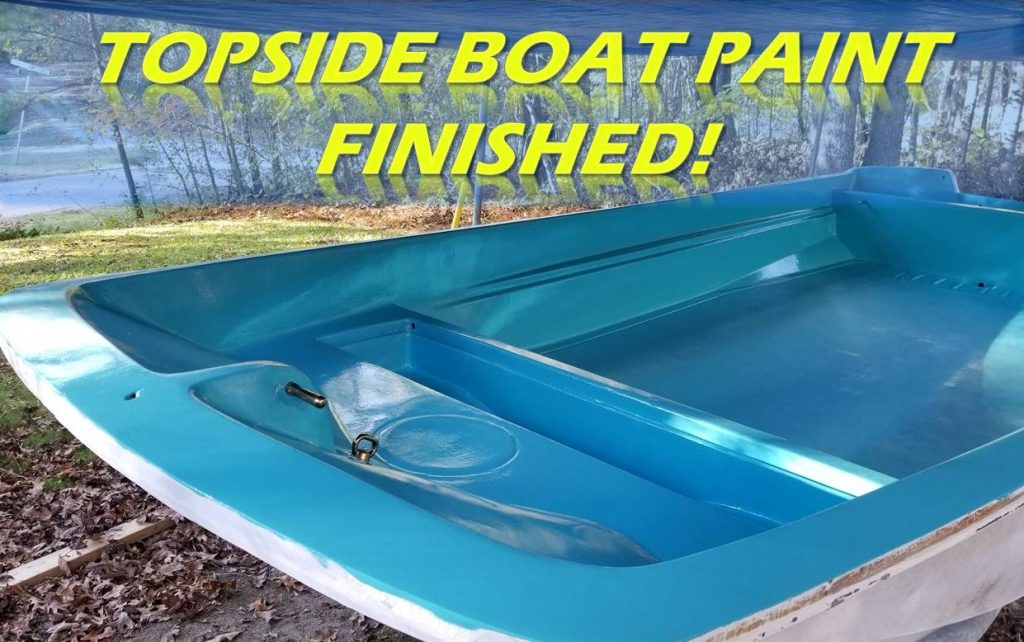
For the areas that would have high traffic or has high visibility I added a third coat. Once again, most of this was rolled and tipped. I basically repeated the same process when applying. Carefully tipping across from the direction I rolled it on. I’m extremely pleased with the results. One thing I have to point out is that these marine paints are designed to self level. They do a fantastic job of that! You can see a difference between the areas that were just rolled and those that were tipped as well. The tipped areas are definitely smoother. But I have to give credit to the areas that were just rolled. They also smoothed out pretty well. Here are a few pictures of teh finished topside.
Below is a partial list (#ads) of the materials I used for this phase of the Boston Whaler Restoration.
Next Steps
Now that the interior has a finish coat of paint on it, I’ll be prepping the hull for it’s restoration. Winter is here now so I wont be working with any resins. What I will be doing is turning the boat upside down on stands. After that, I’ll be sanding it and getting it ready for painting in the Spring. Stay tuned!