This is my try at a hydroponics Koi pond filter. If this works out, it solves two problems with one solution. Keeping the nitrates down in a Koi pond is always a challenge, couple that with an interest in hydroponics, this seemed like a good approach in solving both problems. This setup is temporary, after all, it is an experiment. If this is successful, I’ll build a permanent frame and add two more levels to it next year. The system itself is somewhat of a hybrid. It works like a closed loop system but is using water from the pond that runs through the hydro setup and then gets returned to the pond.
The Overall Plan for the Hydroponics Koi Pond Filter
My Koi pond is composed of two ponds. The main pond is about 1100 gallons and there is a smaller pond, about 100 Gallons about 25 feet behind and above the main pond. I have a series of waterfalls ans streams that connect the upper pond to the main pond. I installed this pond about 10 years ago and ran underground flex pvc from the bottom pond to the top pond using PVC bulkhead fittings.
The top pond servers several purposes. It’s decorative and provides a starting point for the steam and waterfall sections. More importantly, it acts as a muck pond. The water flowing into this ponds stays in it long enough for sediment to settle to the bottom. In effect, it acts as a natural filter of sorts.
I usually start up the stream and waterfall in early to mid Spring. I use a 3000 gallon per hour pump which gives me a pretty decent flow of water. My plan was to tap the output of the top pond filter and run that water through a hydroponics setup and then return it to the pond or stream.
Building a Frame
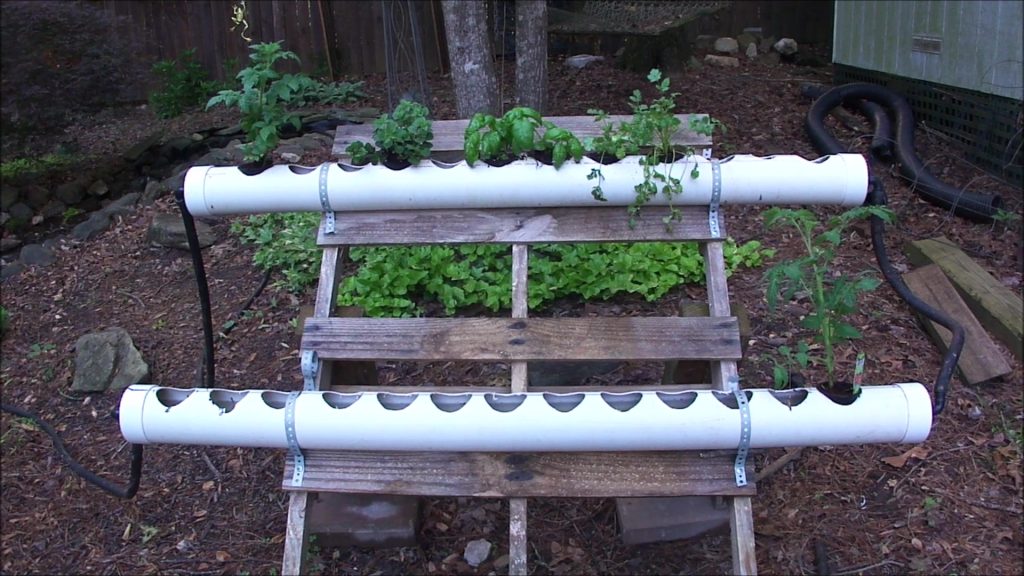
My first inclination was to build a frame to hold the PVC tubes where the plants would receive pond water. Luckily, I had a pallet laying around that would do the job. This saved me some time. I was comfortable with using the pallet, after all, this is an experiment! If this is successful, I will build a permanent A-frame structure. The deign I have in mind would have three, possibly four tubes on either side.
Plumbing and Hose and Fittings, Oh My!
The first thing I needed was to get some four inch PVC Pipe. I used the thin wall variety, the schedule 40 is not only thick, but a lot more expensive. The key was to find the right end caps for this. The fittings for thin wall PVC and schedule 80 are different and are not interchangeable. Luckily, the right end caps can be found at your local home Improvement store, typically in the garden section.
At each of the end caps, I planned to use a bulkhead right angle barb adapter for the hose. Finding these things was a bit of a pain but I finally found some that were made by ActiveAqua called “grow flow elbow hardware kits”. They are relatively inexpensive, about $12 for a pack of six. I only needed five so this worked out perfectly. I ordered the 1/2″ barbs, but they shipped me the 3/4″ barbs, this presented a bit of a stumbling block (3/4″ hose is expensive) but I got around that and will explain later.
Angled Barb Bulkhead Fitting
The Plant Baskets and Media
I wanted to make sure that whatever plants I used for the hydroponics Koi pond filter had a solid base, so I ordered 2″ and 3″ plant baskets. I ended up using just the 3″ baskets, the 2″ ones seemed way too small. Most Hydroponics systems need some kind of media to give the plant stability. Researching this, I found that coconut coir (shredded coconut husk) was becoming popular. It has excellent water retention and aeration properties, is PH neutral and has some good nutrient qualities. Naturally, I went with coconut coir as a media to give the plants stability. Here is an excellent link to information on using coconut coir as a medium in Hydroponics. Just4Growers.
The last thing I purchased was a cheap 50 ft section of 1/2″ I.D garden hose and a valve for it. This turned out to be a bust since the elbow kits that were sent to me ended up being 3/4″. This is especially true since in anticipation of receiving the hardware, I had already cut the hose into manageable lengths for what I needed to do. I imagine that some time in the future one of my projects will call for 1/2″ ID hose. When it does I’ll be ready.
Assembling the Hydroponics Koi Pond Filter
Building the Hydroponics Tubes
The first order of business was to get the 4″ thin wall PVC ready. I cut the pipe into two 5′ sections. Next, I marked a line on it from end to end and marked off where the holes would be, approximately 5″ apart (off center). Using a 3″ hole saw, I cut holes into the pipe along the line I had marked. Every 5″ inches was probably a bit too close as I found out when setting baskets into the holes. Were I to do this over again, I would probably have the holes 8″ apart on center.
Assembling the Fittings
Once I had the holes cut in, I assembled the end caps. This involved parking the exact center and using a hole saw (5/8″ in this case) to cut a hole in it so that the angled barb fitting could be set in place. Finding the exact center is fairly easy. Simply measure across from one side to the other and make a short vertical mark in the middle. Turn the piece 90 degrees and do the same. Where the two short marks meet is the exact center. You may have to extend the marks with a ruler so that they intersect.
Mounting Fittings on Hydroponic Tube End Caps
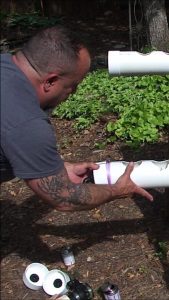
Putting the fittings on was a relatively simple task. Each fitting comes with two washers. I applied a light coating of silicone grease to the washers. When placing the fitting in place, I made sure there was a washer on the inside and outside, directly in contact with the PVC cap. After that, it was simply a matter of hand tightening the nut that held it in place.
Getting Water From the Waterfall Pump to the Hydroponics
There was one last piece that I had to bore a hole in. I’ll be using a 2″ rubber union to connect the valve to the output of the upper pond. My plan was to tap this union to feed the hydroponics system. I bored a hole in this union and installed one of the right angle barbs on it.
Mounting the Hydroponics Tubes
Luckily, I had a roll of steel strap laying around (I’m sure from some long forgotten project). I positioned the tubes on the pallet and used the straps to fix them in place. By placing the tube on a horizontal slat, I was able to secure it in place with the strap by screwing the strap in place, one screw on the bottom and one screw on the top.
Running Water Through the Hydroponics Koi Pond Filter
Once the tubes were in place I glued the end caps with the barb fittings on. While letting that dry, I went ahead and mounted the 2″ valve and barb fitting on the output of the upper pond. By this time, I had given up my search for reasonably priced 3/4″ I.D. hose. I had a 50 ft length of old 5/8″ hose that I thought would work. So I cut the hose and test mounted it to one of the barb fittings. Luckily, with a bit of force, it fit.
Hydroponic-Take Off From Waterfall Pump
Installing Waterfall Take Off For Hydroponics
I ran a section of hose off of the fitting on the top pond to a small hose valve. The large valve in the upper pond will divert water to the hose, the smaller valve will allow me to fine tune the flow of water. From the small valve, I ran a section of hose to one end of the upper tube. Then I ran a section of hose from the other side of the tube to the lower tube. Finally, I ran a section of hose from the other end of the lower tube to the stream.
Getting the System Running
Now that everything is set in place, it’s time to put in and turn on the waterfall pump. That’s another story altogether which I may write about in the future. Suffice it to say, I got the pump installed and pushing water up to the top pond. I used the large valve in the top pond to create some back pressure, this sent a stream of water through the fitting I put in it. By making minute adjustments, I was able to fine tune this stream so that I had a gentle flow of water.
Hydroponic Koi Pond Filter Output into Stream
I had to play with the tuning a little bit so that the hydroponic tubes did not overflow. A bit of fiddling with the second valve got me to a point where the tubes stayed half full with a steady stream of water going through them. I quickly learned that the best way to monitor the flow was to check the final output into the stream. As long as that was flowing, everything was dialed in. Now it’s time to get some plants into the Hydroponics Koi Pond Filter.
Top Hose Running to Hydroponics Koi Pond Filter Bottom Hose Running Back to Stream
Adding Some Plants
I ended up purchasing a few plants in 3″ containers. There are 2 cherry tomato plants, 1 heirloom tomato plant (it was supposed to be a cherry tomato), and a few herbs like Cilantro, Greek Oregano, Sweet Basil and German Thyme. All of these were washed of as much as the original potting soil as I could get off and then set into the 3″ hydro baskets with the coconut coir as a medium to hold them in place. I also set up five baskets with coconut coir and Haricots Verts Green beans. These are thin green beans that are reputed to have great flavor. I’m hopeful that they will germinate and give me some nice bushy bean plants.
Adding Plants To Hydroponics Filter
One nice thing I noticed about the coconut coir is that is wicks the water up almost to the top. This will certainly help with getting the green beans to germinate. I am a bit concerned that perhaps the water temp may be colder than the beans like to germinate, but we’ll find out how this works out in a week or so.
Will This Experiment Work?
The plants have been in the tube for three days as I write this and are looking fairly healthy. I expect to post an update on this in about a month. I plan on taking pictures along the way so we can see how the plants thrive (or fail too) as the my hydroponics koi pond filter experiment progresses. Stay tuned for an update about a month from now.