Building an air cannon is (or should be) a bucket list item for any DIY enthusiast. In my case, I wanted to build a bait launcher for surf fishing. I’ll post several articles on that but for now, I need to start with a reliable and fast acting trigger system for a pneumatic air cannon. Piston QEV (Quick Exhaust Valve) valves appear to be the quickest acting valves for these. I messed around with making a few but eventually decided on a sprinkler valve air cannon trigger instead.
What’s Changed on the New Style Lawn Sprinkler Valves?
QEV Sprinkler Valve Cover
There are numerous references on how to modify a sprinkler valve for an air cannon. What I found when I researched these is that the instructions were for older style sprinkler valves. The old style valves had a lot of meat on the cover. This allowed for a fairly secure way of drilling and mounting a blow gun (which act as a trigger by releasing air pressure) to it. The newer style sprinkler valves have a lot less plastic where you would normally mount the blow gun. This could make them hazardous under high pressure applications.
The Workaround
Here’s what I have come up with as a workaround. Most of the instructions you’ll find online to make a sprinkler valve air cannon trigger will have you remove the solenoid. After that, they will instruct you to seal the two holes in the slot left behind with epoxy. This is where I deviate. I will seal the hole in the bottom middle of the opening left behind, when I removed the solenoid. After that, I will take advantage of the hole going into the chamber where the spring resides. As a matter of fact, I am going to open that hole up with a 3/16″ drill bit.
Next, I used a 1″ MPT schedule 40 plug to replace the solenoid that we removed earlier. There’s some work that has to be done on the plug first before we screw it in. We’ll be adding an air tool nipple to attach a blow gun to it. The old instructions you’ll find have you attach the nipple and the blow gun to the actual cover of the valve. Since the new style sprinkler valves have very little plastic there, that’s not a safe alternative.
QEV Sprinkler Valve Air Cannon pvc plug
A Safe Alternative for a New Style Sprinkler Valve Air Cannon Trigger
Instead, I will mount the nipple and blow gun trigger to the plug itself. Drill a half inch hole into the center of the plug. If you have the correct size tap for the nipple, you should go ahead and tap the hole out. I had a tap that was slightly too small, but I used it anyway to start a thread for the nipple. Next, I put a light coating of PVC glue inside the hole. After that, I screwed the nipple in until it was flush with the cap.
Inserting nipple into pvc cap
There was one more step to insure that the nipple was in there permanently. Use a good epoxy glue and glue the sides around the inside of the cap between the nipple and the cap wall, This will give you an leak proof permanent seal that should hold up the the pressures I would take this valve too (100 psi).
Modifying the Valve Assembly
Nipple Epoxied into pvc plug
Sprinkler Valve Cover Removed
Remove the Valve cover from the valve body. The Rain Bird series typically have six screws holding the cover on. Remove these screws and set them aside. You’ll see a rubber diaphragm with a spring in the middle. You can leave that part alone. Flip the cover you removed over. There will be a very small hole going up to the are where the solenoid was screwed into. What you will need to do is open up the hole from inside the chamber (in the cover) to the area where you removed the solenoid. I used a 3/16th bit. The reason for this is that when you release the air pressure using the blow gun, you want to make sure that enough air leave that chamber to release the valve.
The Rain Bird Valve I used (CP-100) also has a small vent screw on the top of the cover. You can remove that and discard it. At this point we’ll be sealing the hole in the bottom middle of where the solenoid was and the screw slot where the relief valve was. Before going any further, take your 3/16th drill bit and lightly ream out the hole in the middle bottom of the solenoid receptacle I did this so that there would be a little more substance for the epoxy to adhere to.
Plugging Holes in Sprinkler Valve Cover
Sprinkler Valve Plugged Holes in Cover
Use a good brand of epoxy. I prefer the 5 minute variety since it sets up quicker. Mix up a small batch of epoxy and drip some of the mix into the hole where the relief valve used to be as well as the hole in the bottom of the solenoid receptacle. Set this aside and let the epoxy set.
Putting the Air Cannon Sprinkler Valve Together
Now that the epoxy has set, you can install the cover. On this particular model (Rain Bird CP-100) it’ fairly easy to get it right since the cover is indexed with pins to the base. Once you have the cover on and the screws tightened up, you can install the plug and blow gun which will be the working trigger.
I initially installed the plug with Teflon tape. Unfortunately, the base of the valve does not have sufficient threads to seal it, so on my first test I had a minor air leak there. I solved this by removing all traces of the Teflon tape. I then used Epoxy to give the threads a coating (even with the threads) of epoxy and tightened it down. Next I used the remaining epoxy to fill in the gap between the top of the cap and the base of the valve.
Testing the New Style Sprinkler Valve Air Cannon Trigger
Before we go any further, I have to at least bench test this unit to make sure that it will release and fire Here is a short video of a quick bench test. Of course, since the bench test is successful. I’ll have to to a field test as well!
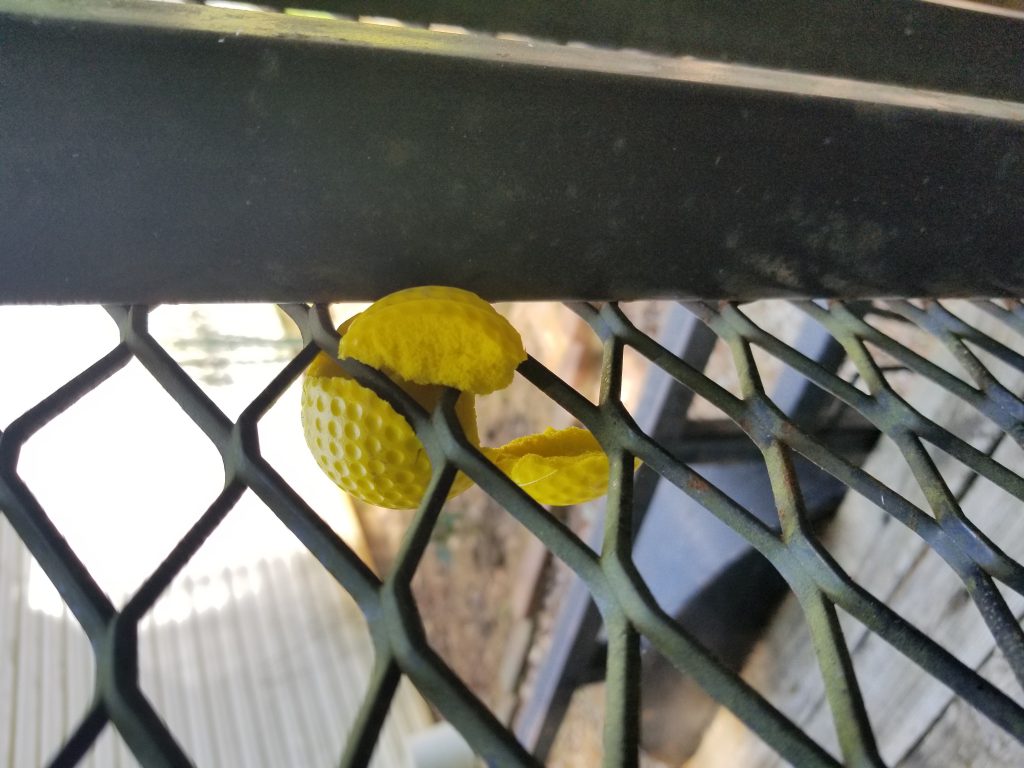
No project like this is finished without a final successful field test! I had already pieced together enough PVC to attach a temporary air chamber to the sprinkler valve. Putting together a temporary barrel was the next step. I used a 2 foot section of 1.5″ pvc and stuffed a soft spongy practice golf ball into one end. Next I hand fit the barrel into an adapter so I could screw it on to the output end of the sprinkler valve air cannon trigger. Finally, I charged the system up to 80 PSI and took it outside for a test.
The results were spectacular! I shot the ball at an expanded steel grate (the ramp on a trailer) and it basically shredded the ball! This was under sub-optimal conditions. The air chamber was relatively small and the barrel was extremely short. I’m sure that when we fire this next with a good sized air chamber and barrel we will get great results!
Troubleshooting
There are a few things that could go wrong preventing the sprinkler valve from firing. Here’s a short list of what I have encountered.
Make sure there is sufficient air pressure to activate the sprinkler valve. I initially tried this at relatively low pressures (10 +/- psi) and could not get the valve to work. After building an air chamber, it was successful at 60 psi and above.
Make sure that the hole you drilled in the valve body did not get obstructed with glue or the plug itself. To solve this, disassemble the valve body and drill through the hole again with the 3/16″ drill bit. I wouldn’t hesitate to open this up a bit further as well. A 3/16″ drill bit should give you sufficient air flow to release the diaphragm and open up the valve but going to 1/4″ drill bit may help with the air flow as well.
I had a lot of fun with this build but need to caution you that working with compressed air and PVC can result in hazardous if not deadly conditions. As part of my build, I made sure to use schedule 40 (80 would be better) pressure rated PVC. I also made sure that the PVC was rated for pressure and not “DWV” (Drain Waste Vent) which is not pressure rated. The DWV pipes are typically marked in black ink and have “Not for Pressure” marked on them. PVC will fragment if it fails under pressure and can cause severe injuries and or death!
This article is for entertainment and educational purposes. If you choose to do a similar project, you do so at your own risk and release and indemnify me from any liability that may result from accidents involving your project.