I’ve wanted to build a bait cannon for a long time. Now that I’ve got one done, I want to share the build with you. I designed this air cannon to be modular. Meaning you can change the air chamber and barrel to whatever size you need. This gives you the flexibility to convert it to a spud gun, a tennis ball launcher, or even a T-Shirt gun!
Building the Bait Cannon
The biggest part of building the bait cannon was getting all of the parts together. I’ve added a complete parts list below that you can bring up as a pdf to build the air cannon as I built it. You can modify parts to fit your particular needs. The only thing I will caution you on not changing is to make sure you use schedule 40 or better pressure rated PVC fittings and pipe. Make sure the pipe is pressure rated and not DWV (Drain Waste Vent). In my experience, pressure rated usually has red markings whereas DWV is marked in black. In any event, please read the markings on the pipe to make sure it is pressure rated!
I’ve broken the build up into five major steps. I’ll cover each of the steps individually. For all of the steps, make sure you use PVC primer and fresh glue. Old glue tends to gum up and loses it’s capability to fuse components together. You want a good solid glue joint, especially since you’ll be dealing with high air pressure! The two components not on the list below are a piece of wood to act as a brace between the barrel and air cylinder as well as a modified sprinkler valve. I have an article on modifying a sprinkler valve. Air Cannon Sprinkler Valve Trigger Modification on New Style 2019 Valves!
Building the Section from the Air Chamber to the Sprinkler Valve
This Diagram shows the layout from the air chamber receptacle to the sprinkler valve. The key things to watch for when assembling this piece of the air cannon is keeping the two right angles at the back of the cannon straight. You want to make sure that the barrel and air chamber are parallel to each other when gluing this part of the section together. One aspect of this part of the bait cannon I want to point out. The last piece on this section where the air chamber connects too is FPT (Female Plumbing thread). I did this intentionally for two reasons. 1) the thread is protected if you need to change air chambers. 2) You have the flexibility to change air chambers to larger or smaller depending on what you are shooting.
Spud Gun Air Chamber to Trigger
I built this chamber so that it had a 3 to 1 chamber to barrel ration (actually 2.89). I’ve read that a 1:1 ratio is fine but when I ran that through a spreadsheet model I have, a starting pressure of 100 PSI will have an exit pressure of approx 35 psi when the projectile leave the barrel. A 3:1 ratio gives an exit pressure of approximately 75 PSI. With that exit pressure, the projectile is still accelerating briskly as it leaves the barrel.
Assembling the Receiver for the Barrel
This is probably one of the easiest part of the build. There are just three parts to this. Glue them together as seen in the diagram and you’re done.
Air Cannon Trigger to Barrel Receiver
Building the Air Chamber for the Bait Cannon
This piece is a little more complex than the last but still simple. Focus on good strong glue joints, This chamber will hold all of the air needed for your shot at high pressure. Generally somewhere between 100 and 110 psi. You don’t want it flying apart. Aside form the fact that it can seriously hurt you, that would ruin the perfect cast you were shooting for!
Bait Launcher Barrel
Ok, This part is even easier than the receiver. There’s two parts, glue them together!
Bait Launcher Barrel Diagram and Parts
I chose to use a threaded type schrader valve for this. A lot of folks use the push-in in kind, which is fine, but I think the threaded valve is more reliable under high pressure. I drilled a 1/2″ hole in the end of the cap and trimmed down one of the rubber washers so I could get the bolt on it. The end cap is extremely thick, which is why I had to trim down the washer. By all means, get the schrader valve on the end cap before gluing the end piece on! I’ve see some folk try to do this afterwards which is quite hilarious, but generally aggravating as hell if you’re the one doing the build.
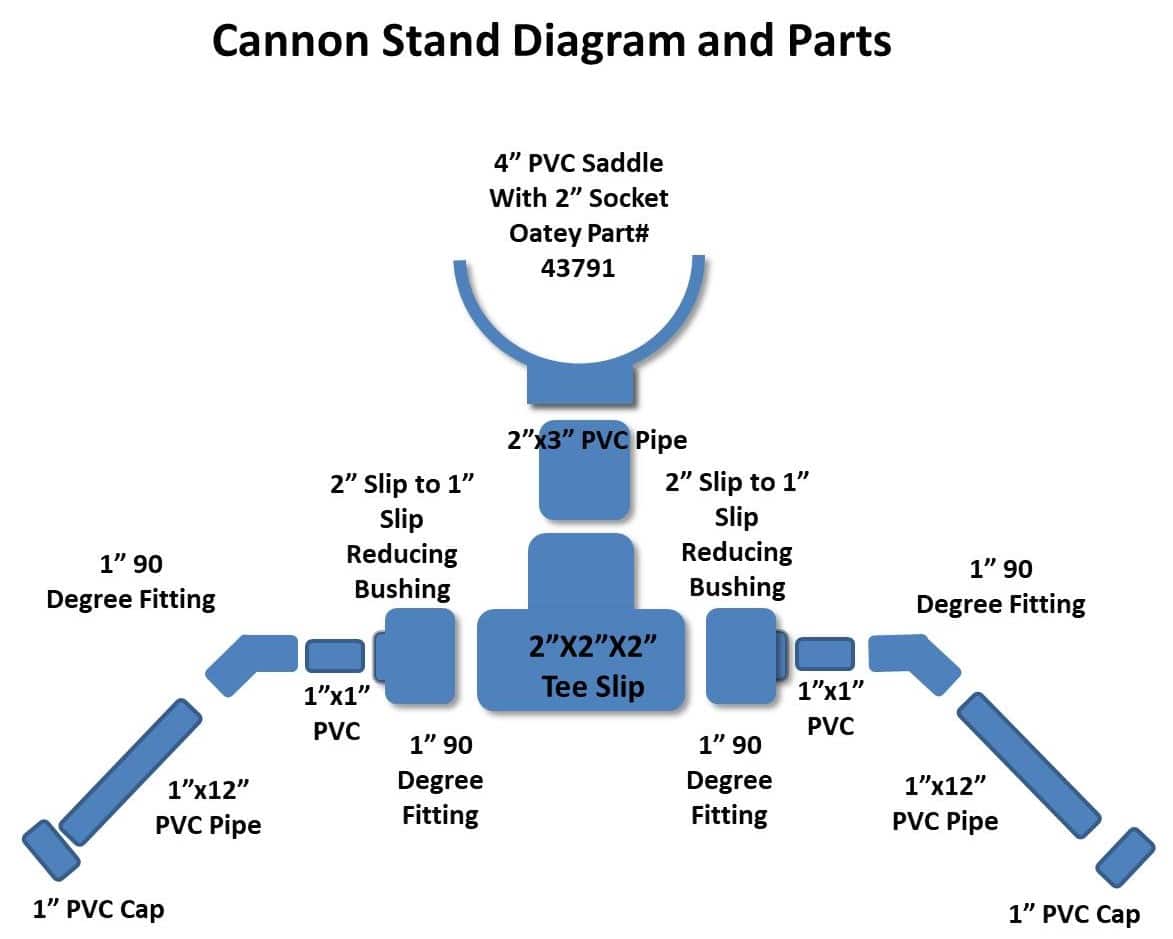
Lets Build a Stand for the Air Cannon
Bait Cannon Stand Parts and diagram
This part is optional. I think it finishes out the build quite nicely and is aesthetically pleasing. Note, I’m proud of it since I came up with the idea, lol. I’ve seen air cannons that are handheld, as well as a number of different stands for them. I prefer having a stand that will hold the cannon at a good angle. The other important thing to me is portability. I designed the stand so that it is is removable. The Oatey Saddle makes this possible. Another benefit of the Oatey Saddle is that you can move it up and down the air chamber, changing the angle of the entire cannon.Just remember NOT to glue the stand to the saddle!
Adding a Brace to the Barrel
The last thing I did was add a brace between the barrel and the air chamber. The brace stabilizes the barrel relative to the air chamber. This not only keeps the barrel from swaying around but also relieves stress on the two right angle joints in the back of the air cannon. I temporarily used tie wraps to hold it together but switched over to two sided velcro (when I finally found the roll I knew I had laying around).
Outline of Barrel Brace for Air Cannon
Closeup of Barrel Brace for Bait Cannon
Putting it All Together
Once you have all of the above steps complete, the final assembly is simple. Screw the air chamber on (if you havent already done so to set up the stand). Then, Screw the barrel on and install the brace. When screwing teh PVC fittings together, make sure to use sufficient Teflon tape. You can use either the white or the thicker yellow. I’ve used the white on all my high pressure PVC fittings an have never had a problem with leaks. It’s your call as to which one you want to use.
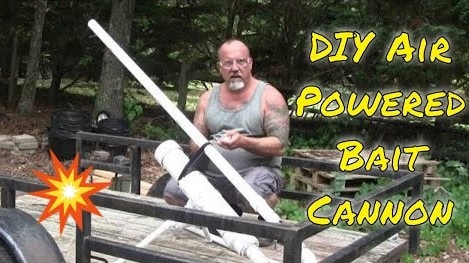
Field Testing the Bait Cannon
Of course I wouldn’t be done with this article without a field test. I shot a 1.5″ whiskey ice ball at a 1/2″ pice of OSB board. The results were beyond expectation! Watch the video on the left and you’ll see what I mean. The green hose was attached to a portable SlimePro Air Compressor and only took a few minutes to reach a 110 psi Charge.
Items Related to this build
Make sure to read the article on modifying the Sprinkler Valve and the Bait Launcher Tests at the Beach
I had a lot of fun with this build but need to caution you that working with compressed air and PVC can result in hazardous if not deadly conditions. As part of my build, I made sure to use schedule 40 (80 would be better) pressure rated PVC. I also made sure that the PVC was rated for pressure and not “DWV” (Drain Waste Vent) which is not pressure rated. The DWV pipes are typically marked in black ink and have “Not for Pressure” marked on them. PVC will fragment if it fails under pressure and can cause severe injuries and or death!
This article is for entertainment and educational purposes. If you choose to do a similar project, you do so at your own risk and release and indemnify me from any liability that may result from accidents involving your project.
A Final Note: This page is best viewed with anything except Internet Explorer, Explorer seems to open up all of the diagrams to full size on it’s own.