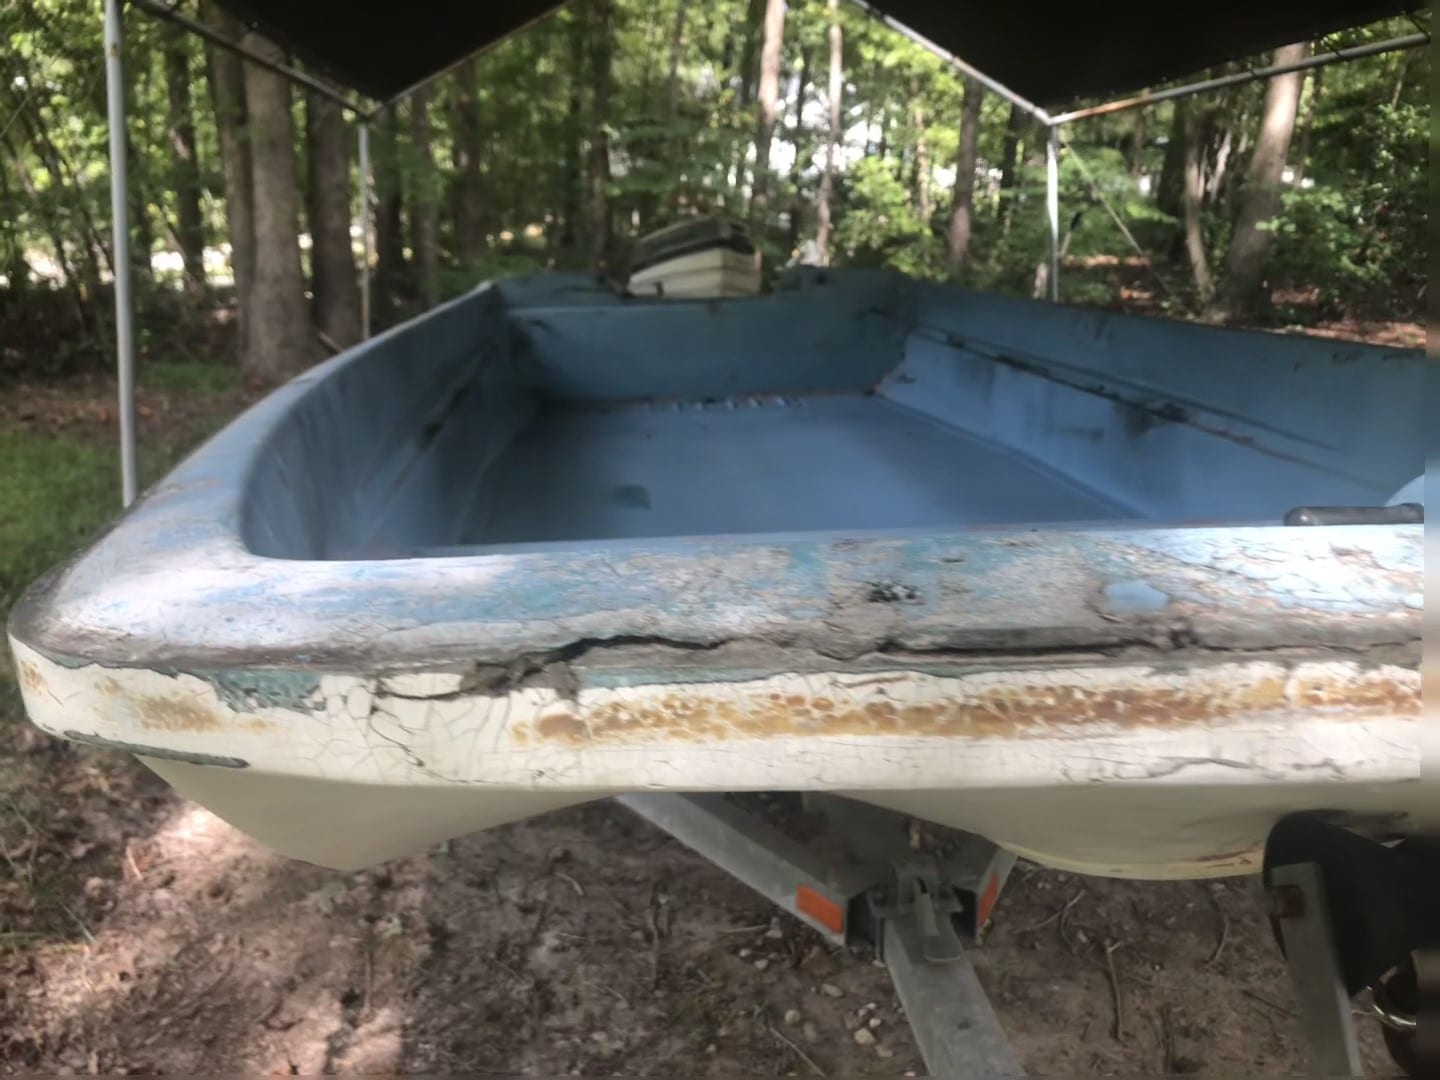
This old Boston whaler has some severe fiberglass delamination on the bow. There are a number of techniques that can be used to do a delamination fiberglass repair. I decided to go with injecting an epoxy based resin. Identifying the obvious spots is pretty easy. But, you also have to take the time to find soft spots. In the case of this Whaler, there were a number of soft spots on the top as well as the front of the bow. These soft spots were probably a result of some fiberglass delamination as well as the foam core underneath being degraded.
Identifying and Marking the Areas Needing Delamination Fiberglass Repair
As pictured on the below left, the area with complete separation were pretty easy to identify. I didn’t bother marking these. They would be fairly obvious when using the epoxy resin to fill in the gaps. I was more concerned with identifying the soft spots. Consequently, I carefully went over the entire bow looking for soft spots. Using a maker, I marked off the general areas that showed weakness. After that, I marked of spots where I would be drilling holes to inject the epoxy resin.
Prepping the Delaminated Fiberglass
Now that I had all of the cavities and soft spots marked, the next step would be to prep the area for the epoxy resin. I started by removing any obviously loose paint or gel coat. Next, I used a drill bit that was the same size as the syringe tip that I will use to inject the resin into the cavities. In this case, I used a 15/64″ bit. It’s an odd size, but looked like it would provide the best fit.
The next step is to drill holes into the areas that I had marked. These were the weak spots I had identified earlier. After drilling, I vacuumed the areas to get all of the debris out of the holes and as a general cleanup. The last step before using any epoxy was to wipe the entire area down with acetone. Acetone will degrease and remove any contaminants that might prevent the epoxy resin from adhering.
Epoxying the Delamination Fiberglass Repair
Choosing a good epoxy resin is important. I prefer to use products that are specifically made for marine applications. I used the Epoxy resin from Total Boat. Actually, I decided to do this complete boat in their products. No, they don’t sponsor me, but they do have a wealth of technical information and application videos on all of their products. They also have a broad selection of paint and filler products. One added plus to using their epoxy is ease of measuring. The resin and hardener both have pump spouts. One pump of each gives you the correct ratio of resin to hardener.
Milled Glass Resin Thickener
Milled glass fiber is an excellent additive to have when doing delamination fiberglass repair. It is used as a thickener for both polyester and epoxy resins. What I generally do is start with a straight mixture (in this case epoxy). The straight mix is syrupy and runs fairly easily. This makes it ideal for areas where you want it to flow. Examples of that would be if you are laying fiberglass mats or filling in bored holes (like I am about to do).
After I am done with those I will add some milled glass thickener to the resin to give it a thicker consistency. Some what like the thickness of honey. You can use this to fill in smaller holes. This consistency is best suited for screw holes or other bored holes in the fiberglass. Lastly, if needed, I will add even more milled glass to the mix until I get a thick paste consistency. You can use it in this state as a fairing compound (think bondo). If there are large gaps or holes you need to fill, this is the consistency you want it at. It is easy to apply and there is little sagging or running in this state. I used it to fill a large gap in the stern of the boat (see picture below “Stern Whaler epoxy Repair”). One added benefit, at this consistency, it is easy to shape with a sander!
Filling in the Drilled Holes in the Delaminated Fiberglass
Now comes the fun part. I put three pumps of resin and 3 pumps of hardener into a mixing container and gave it a good mixing with a stick. Once I was sure that it was well mixed, I used a 60 ml syringe with a catheter tip to draw up about 30-40 cc of the resin into the catheter. I then carefully placed the catheter tip into the holes I had drilled and injected the resin mix under the fiberglass delamination. On my first go around I went a bit too hard on the syringe and had a lot of excess.
On the second go around (port side) I learned to slightly pull back on the plunger so that I did not have excess epoxy all over the fiberglass. I was especially careful around the front edge of the bow. Any excess there would create large drip lines that I would have to deal with later.
Adding Milled Glass Thickener
As planned, I had some leftover epoxy resin. I added some milled glass, enough to bring it to the consistency of a thick syrup. I used that epoxy to fill in some of the holes that were on the topside of the boat. There are holes from where the anchor light was attached as well as several other holes that had been drilled into the insides and along the gunwale.
Stern Whaler Epoxy Repair
I took the remainder and added more milled glass to it. At this point, it had the consistency of a thick paste. I used this epoxy paste to fill in some of the larger gaps in the fiberglass delamination. I also used the remainder of it to patch an area in the stern that was missing all of the gel coat. This area came out fairly nice and only needs some fairing compound to finish shaping and smoothing it (see picture above right).
Sanding down the Delamination Fiberglass Repair
And now for the fun part. Sanding.After the epoxy cured, I used a belt sander loaded with 80 Grit paper to shape the repairs I had done to this point. I also took the time to sand the gunwale front to back. This helped remove some of the old paint and loose gel coat. It also shaped the areas that I Had filled in with various consistencies of thickened epoxy.
The epoxy will shrink some after it cures. So I mixed up a smaller batch of epoxy and went through the entire process once again. The last batch of epoxy was fully cured after 24 hours. So at this point I lightly sanded the entire bow and gunwale again. You can see the before and after picture at the top of this article.
Below are Affiliate Links to Materials I used in this project:
Next Steps in Restoring this 1966 Boston Whaler 13
My next article on this restoration will be on repairing the hole in the anchor locker. There’s a huge hole there, I presume from having an anchor bounce around in it since 1966. That will get fixed and then I’ll move on to soda blasting the interior.