If you own a 2006 era Silverado or Sierra you may be seeing your rocker panels rusting away. This seems to be a common problem with the Silverado rocker panel. Luckily, there are a number of replacement rocker panels available at a reasonable price. You’ll find various methods of putting these on. They range from completely cutting out the old panels and replacing with new ones to covering up the old ones with a replacement.
In this article I’ll cover the latter format. We’ll trim the replacement Silverado rocker panel to fit, prime and cover it the outside with truck bed liner and then glue and rivet the replacement panel over the old one. I’ll also grind out the rusted sections, clean out the rust and treat the inside with a rust converter primer.
Trim the Silverado Rocker Panels to Fit
The first step in installing a replacement Silverado rocker panel is trimming it for a correct fit. We started with teh driver side in this article. Most of the pictures you’ll see here are of the driver side panel. We did however, replace both sides.
The ones we got for this project were semi custom fit. The sides towards the rear of the truck were nicely done. Requiring only a minor bit of trimming on a corner so that it would sit in flush with the cab corners. The front however, was another story entirely. It looks as if it was meant to overlap the seam and attach to the front panel.
Marking the Replacement Rocker Panel
Cutting to Fit
We fit the rocker panel to the old one, being careful to match the rear of it to the vehicle and marked the front. I followed the contour of where the old rocker panel ended. After that, marked a line along the top and bottom marks I created. Then, I used a cut off wheel on a grinder to cut the panel along that line.
Silverado Rear Edge of Rocker Panel
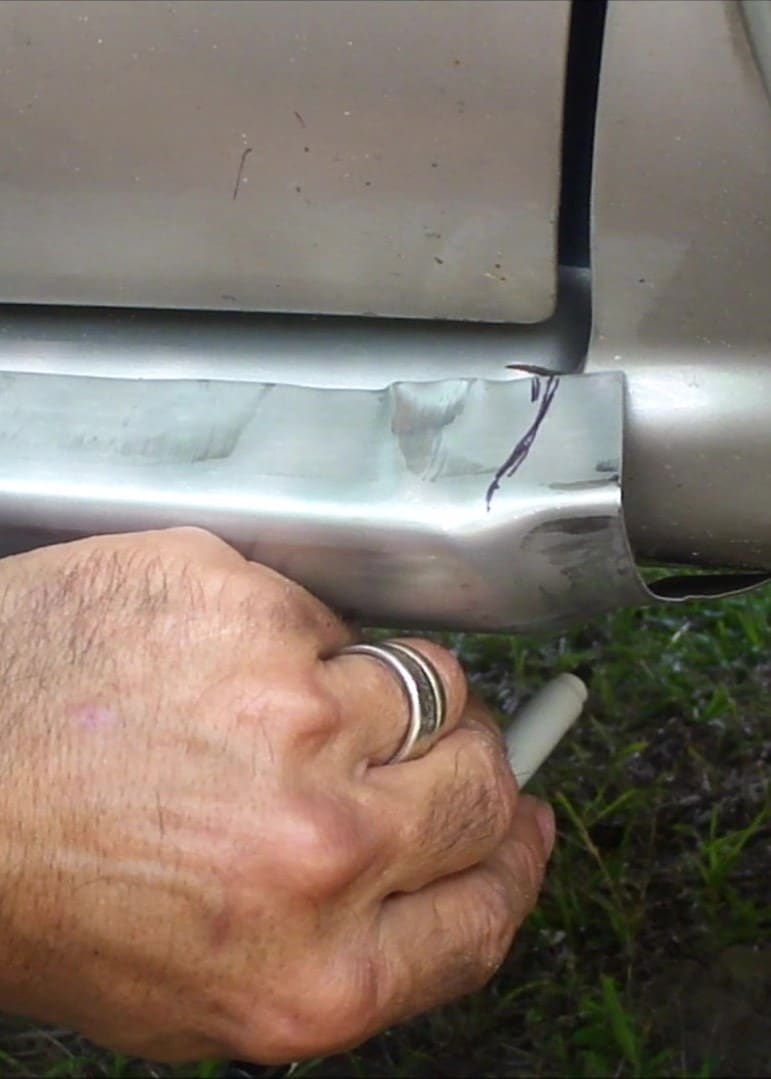
Rocker Panel Edge Ground Down
The rear of the replacement panel has a sharp edge that interferes with it being able to fit flush against the cab corners. I used a grinder to round that edge off and and get a good fit.
This ensures that the new panel will fit flush up against the old when gluing and riveting it on.
Priming and Painting the Rocker Panels
The next step is priming the new Silverado rocker panels. First, I cleaned the rocker panels with acetone and a clean rag. Next, I put a good coat of primer/rust preventative on both sides of the rocker panels. After that, I sprayed the outer facing side with Krylon truck bed liner.
This is sold in a spray can so is fairly easy to apply. I’ve done two part spray liners before and this isn’t anywhere near as complicated to messy. An added plus is that it’s easy to clean up with acetone. I ended up putting three coats of the truck liner on the outside.
I was able to paint the rocker panels since I was going to attache them with glue and rivets. If you were to use spot welds instead, you would have to finish the panels after putting them on the truck. Attaching the panels with spot welds is a good alternative to rivets. However, most handymen (including myself) don’t have spot welding equipment.
Getting Ready to Install the Rocker Panels
Before trying to install the new rocker panels, I wanted to clean up the old ones. I used a grinder to grind away all of the rusted areas. After opening up all of those areas, I carefully picked out the large pieces of rusted panel that had fallen off. Next, We blew out the insides to eliminate as much of the rust particles as possible. Once that was done, I used the openings to spray Rust-oleum Rust converter inside the existing rocker panels. This isn’t going to stop the rusting of those old panels completely, but it should slow down the rusting in those areas that were affected.
Grinding Out The Rust Areas
Installing the New Silverado Rocker Panels
Clean the Old Rocker Panels
The first step in installing the new rocker panels is to clean the old ones up. We’ve already removed the rusted out areas and primed the interiors. Wiping down the entire Rocker panel with acetone will ensure good contact for the glue we’re about to use. Alternatively, you can use denatured alcohol or any other cleanser that will remove old wax and any grease that is on the panels.
Glue the New Rocker Panels On
Once the old panels are clean you can glue (we’ll rivet them as well in the next step) the new panels on. We used Surebond SB-12 metal glue. It is an extremely thick glue that cures to a hard rubber consistency. I particularly like this as it will fill any gaps between the new and old panels. An added plus is that it has sound deadening qualities!
Applying Glue to New Panel
To get a good solid bond, I used a tube for each new Silverado rocker panel I put on the truck. I put a fairly fat bead on the top inside where the channel make a J shape. This area is critical as the entire panel hangs by this section over the old one. Once I had that bead of glue in there, I spread the remainder of the tube over the inside flat edge of the new rocker panel.
Riveting the New Rocker Panels
In my opinion it isn’t quite enough to just glue them on. I feel much more comfortable with a good mechanical bond as well. To do this, I used 3/16″ blind rivets. These were installed about 2 inches from the bottom of the new panel. I put seven of these on each side, roughly a foot apart. Start at the center and work your way out. I made sure to put pressure on the new panel to spread the glue out as I riveted.
Riveting Rocker Panels On
Finishing the New Silverado Rocker Panels
Now that we’ve got the new rocker panels mounted, it’s time to finish it up. I had a small gap between the old and new rocker panels in the front. I filled these with fairing compound. Bondo is perfectly acceptable but I have fairing compound on hand since I am in the midst of restoring an old Boston Whaler. Essentially, fairing compound is the marine equivalent of Bondo.
Filled in Gap
Final Finish Silverado Rocker Panel
Filling in that gap is important as you do not want to leave a largish opening for water to get in and create more damage. Once I had that gap filled in, I used a small rat tail file to lightly shape it. Next, I masked off the area around it and applied two coats of the truck bed liner so it would blend in to the rest of the new Silverado Rocker Panel. I’m quite happy with the end result. it blends right in with the body lines and covers up and protects the original Rocker Panels.